[section_inner]
BULLdecking®, the new
strong universal
hidden fixing
for decking
[emphase_block]
[emphase_item content=”Quick and easy installation fits all grooves, 1 only tool required: Torx TX20″ link=”/en/installation” link_text=”Read more” image=”/wp-content/uploads/2016/05/bd-tool.png”][emphase_item content=”BULLdecking® 3 axes system fully assembled, just screw it without drilling need” link=”/en/technical-characteristics/” link_text=”Read more” image=”http://bulldecking.com/wp-content/uploads/2016/05/bd-product.png”][emphase_item content=”A universal hidden fixing & highly resistant” link=”/en/the-product” link_text=”Read more” image=”http://bulldecking.com/wp-content/uploads/2016/05/bd-notice.png”]
[/emphase_block]
[/section_inner]
[section class=”bg-beta” bg_image=”http://bulldecking.com/wp-content/uploads/2016/05/bd-montage-video-bg.jpg” ratio=”45%”]
[section_inner]
Discover the mounting video!
[/section_inner][/section]
[section_inner]
5 steps for quick installation
-
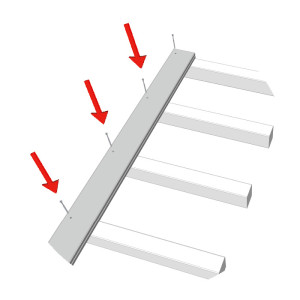 1 Drill and screw the external part of the first board on the joists.
 -
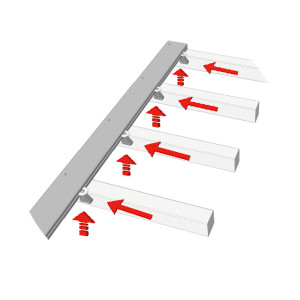 2 Insert the EVO screw head in the groove in pressing up its position before screwing the 2 side screws. Fix 1 [logo] per joist.
 -
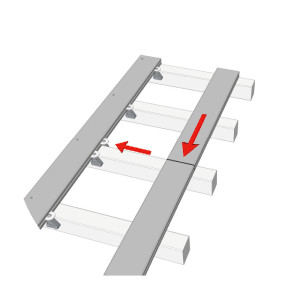 3 Prepare finger-joist of 2 boards, add one [logo] fixing on the opposite side of the joist.
 -
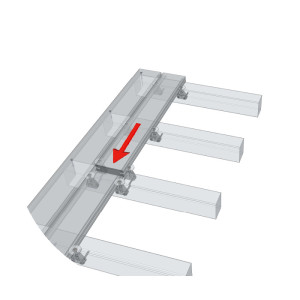 4 Position the 2 finger-joint boards and fix 2 [logo]: one on each side of the joist.
 -
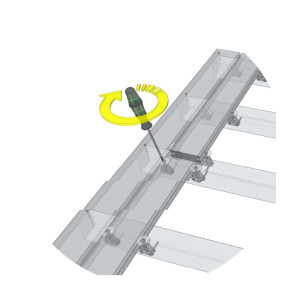 5 Tighten 2 or 3 turns the EVO screw to fit the right pressure on the first line of [logo] fixings.
[/section_inner]
